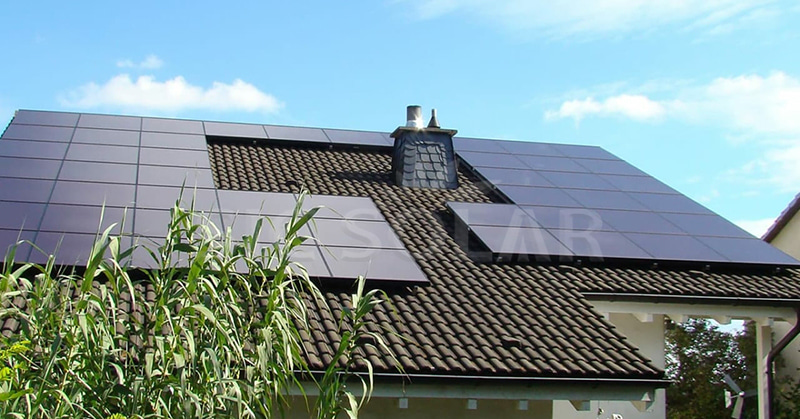
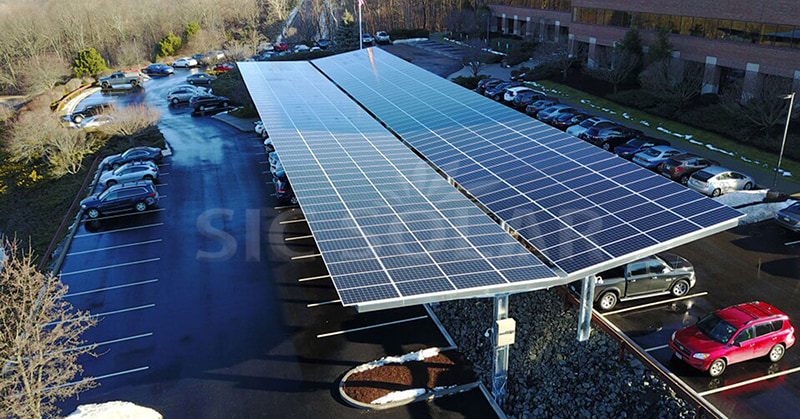
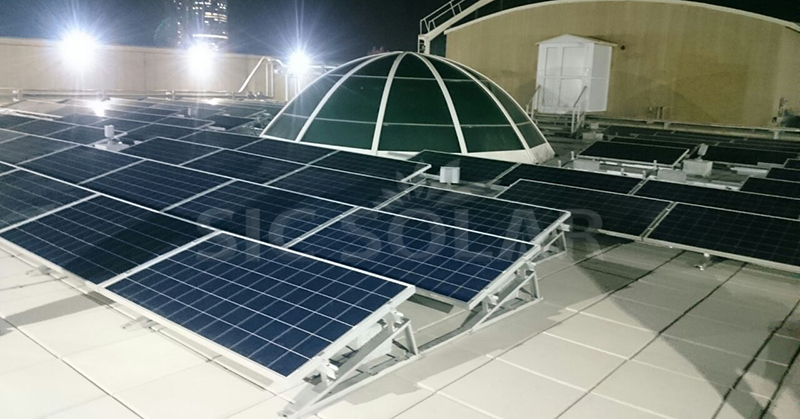
How Are Solar Panels Fixed to Tiles?

Installing solar panels on tiled roofs requires careful planning and precision to ensure the system is securely attached without damaging the tiles or compromising the roof integrity. 


The Challenges of Installing on Tiled Roofs

  1. Fragility of Tiles
    Tiles, especially clay and ceramic tiles, are prone to cracking or cracking during installation.

  2. Roof Waterproofing
    Drilling or installation misalignment can create gaps, which can lead to potential leakage.

  3. Variety of Tile Designs
    Tiles come in a variety of shapes (flat, curved, or interlocking), so it is crucial to choose an adaptable mounting system.

  4. Aesthetic Concerns
    Visible and misaligned systems can damage the appearance of the roof.


Methods for Fixing Solar Panels to Tiles

  1. Tile Replacement Brackets

    • How It Works: Replace some roof tiles with metal brackets that mimic the original tile shape.
    • Advantages: Maintain the water resistance of the roof without drilling holes in the tiles.
    • Application: Commonly used in clay, concrete and ceramic tiles.
  2. Hook-Based Mounting Systems

    • How It Works: Stainless steel hooks slide under existing bricks and attach to the roof structure.
    • Advantages: Prevents direct contact or drilling into the tiles.
    • Compatibility: Suitable for curved or interlocking tiles.
    • Example: SIC Solar tile hooks are designed for easy installation and long-lasting durability.
  3. Adhesive and Rail-Free Systems

    • How It Works: Adhesive-mounted bases are used, eliminating the need for traditional rails.
    • Advantages: Lightweight and ideal for preserving roof integrity.
    • Considerations: Requires thorough cleaning of the tile surface for proper adhesion.
  4. Drill and Seal Technique

    • How It Works: Drilling into the tile and roof structure with proper sealing to prevent leaks.
    • Advantages: Provides a strong and permanent installation.
    • Caution: Precision is essential to avoid cracking tiles or creating weak points.
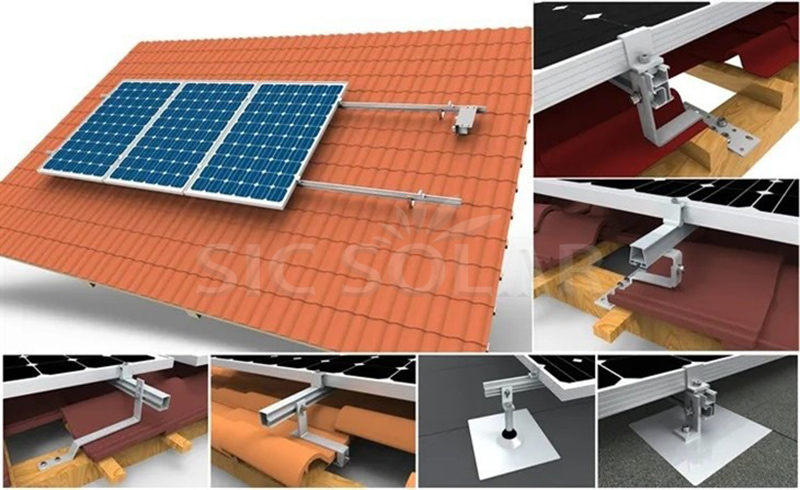
tile roof solar mounting brackets


Key Steps for Installing Solar Panels on Tiles

  1. Assess the Roof Type
    Understand the tile material (e.g., clay, slate, or concrete) and design to select the most suitable mounting system.

  2. Prepare the Area

    • Remove debris and inspect tiles for cracks or damages.
    • Replace damaged tiles to ensure a stable foundation.
  3. Select the Right Mounting System

    • For curved tiles, consider hook-based systems.
    • For flat tiles, replacement brackets or adhesive systems may be ideal.
  4. Install the Mounting Brackets

    • Attach the brackets or hooks to the roof structure (rafters or beams) for stability.
    • Ensure proper alignment and spacing based on panel dimensions.
  5. Place the Rails and Panels

    • Attach rails to the brackets for a secure base.
    • Mount the solar panels onto the rails, ensuring even distribution of weight.
  6. Seal and Inspect

    • Apply waterproof sealant to any drilled areas.
    • Conduct a final inspection to check for gaps, loose components, or tile damage.

Benefits of Tile Roof Solar Panel Systems

  • Durable Installation: Properly mounted systems last decades without compromising roof integrity.
  • Energy Efficiency: Tile roofs, known for their insulation properties, complement solar panels in optimizing energy performance.
  • Aesthetic Appeal: Professional mounting systems, such as those offered by SIC Solar, provide a clean and streamlined appearance.

Why Choose SIC Solar for Tiled Roof Mounting Systems?

SIC Solar offers a range of high-quality photovoltaic mounting solutions tailored to various roof types, including tiled roofs. Their innovative designs, such as tile hooks and replacement brackets, prioritize durability, ease of installation, and waterproofing. SIC Solar's commitment to quality ensures that solar panel installations remain secure and efficient throughout their lifespan.


Mounting solar panels on tiled roofs can be a seamless process when using the right tools and methods. By choosing specialized components like those provided by SIC Solar and following best practices, homeowners can enjoy a long-lasting and visually appealing solar energy system.
How Do You Seal the Gap Between Solar Panels?

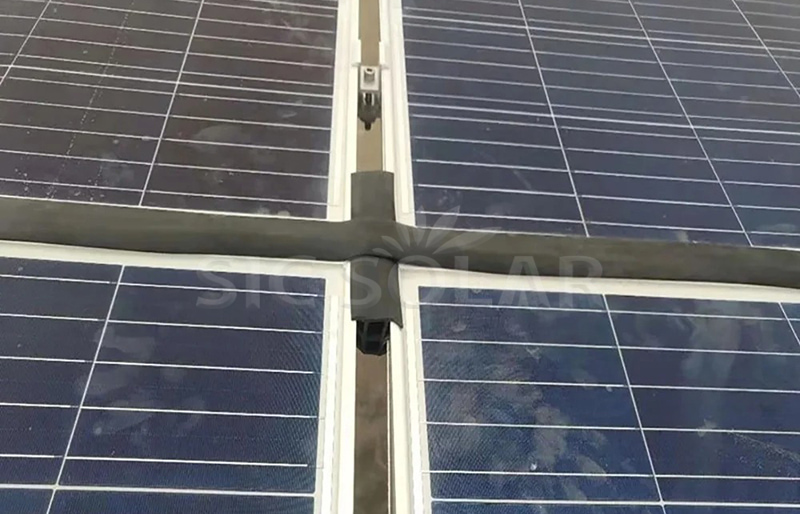
Sealing the gaps between solar panels is essential for a variety of reasons, including water resistance, anti-debris, improved wind resistance, and aesthetics.

The importance of sealing gaps in solar panel installations:

  1. Waterproofing: Seals channel water out of vulnerable areas, preventing rainwater from seeping into crevices and damaging roofs or substructures.
  2. Anti-debris: Sealing minimizes the accumulation of leaves, dust, and other debris in the panel crevices, which can impede airflow and reduce panel efficiency.
  3. Improved wind resistance: A well-sealed array enhances stability and protects the installation from wind lift during storms.
  4. Aesthetics: Sealed, cohesive solar panel arrays provide a cleaner, more professional appearance.

Technology for sealing the gaps between solar panels:

  1. Weatherproof Flashing: Installed between panel rows or at the edges, flashing guides water away from gaps and is durable and highly effective in preventing water infiltration.
  2. Rubber Sealing Strip and gasket: Special tape or rubber gasket can fill small gaps between panels, making it easy to install and cost-effective.
  3. Rain gutters: Some installation systems integrate channels similar to rain gutters to redirect water flow, which is very useful for pitched roofs that are worried about water loss.
  4. UV-resistant silicone sealants: These sealants are used to fill gaps and form a waterproof barrier, making them versatile and compatible with a wide range of panel types.

Integrated sealing solutions: High-quality installation systems typically include pre-designed sealing mechanisms, such as those from SIC Solar, which feature precision-engineered components for tight panel alignment and enhanced sealing performance.

rubber seal strips

Steps to effectively seal the gap:

  1. Examine the gaps: Evaluate the spacing between panels and measure the gaps to determine the appropriate sealing solution.
  2. Cleaning areas: Remove dust, debris, or moisture from crevices to ensure proper bonding of tape, gasket, or sealant.
  3. Select the right material: Choose materials specifically designed for solar applications, such as UV-resistant sealants or high-durability tape.
  4. Apply sealing assembly: Install waterproof board, tape or sealant according to manufacturer's instructions to ensure there are no air pockets.
  5. Testing and maintenance: After installation, check for leaks or vulnerabilities and perform regular maintenance to ensure that the sealing solution remains effective.
  6. The benefits of properly sealed solar panels include:
  7. Increased efficiency: Sealed systems reduce downtime due to weather-related issues or debris build-up.
  8. Extended service life: Protecting the roof and bracket system minimizes wear and tear.
  9. Reduce maintenance costs: Preventive sealing can reduce the need for frequent maintenance.

How SIC Solar can help:

SIC Solar is a trusted manufacturer of photovoltaic installation systems that simplify the installation process and improve system reliability. Their innovative designs include features such as integrated water management and precision engineering to ensure panels are securely aligned with minimal clearance. By using SIC Solar's installation solutions, installers can achieve professional-grade sealing and long-lasting system performance.

In summary, sealing the gaps between solar panels is a critical step in any solar installation. Whether through waterproof panels, sealing tape or an advanced installation system, ensuring a waterproof and debris-free installation protects your investment and increases the efficiency of your solar system. Working with experts such as SIC Solar ensures your project is equipped with the best materials and technology, guaranteeing years of reliable performance.

How Do You Use Solar Mounting Brackets?

Solar mounting brackets play a key role in the successful installation of solar panels. They provide the necessary support to keep the solar panel firmly in place while optimizing its angle for maximum efficiency. Whether rooftop, ground or wall mounted, choosing and using the right mounting brackets ensures durability and performance.

SIC Solar is a company specializing in the production and sale of photovoltaic installation systems, providing high-quality solar installation solutions for a variety of installation needs. Below, we will explore how to effectively use solar mounting brackets and the key factors to consider during the installation process.


Understanding Solar Mounting Brackets

Solar mounting brackets are structural components used to fix solar panels. They come in a variety of types to suit different installation scenarios, such as:

  1. Rooftop Mounting Brackets: Designed for pitched or flat roofs.
  2. Ground Mounting Brackets: Solar systems for ground mount.
  3. Adjustable Brackets: Allows to adjust the angle to maximize the use of sunlight.
  4. Specialized Brackets: Include options for walls, carports, or other unique structures.

These brackets are usually made of durable materials such as aluminum or stainless steel, ensuring that they can withstand severe weather conditions.

solar panel ground stand


Steps to Use Solar Mounting Brackets

  1. Evaluate the Installation Site

    • Roof Installations: Check the material, slope and structural integrity of the roof. Metal roofs usually work well with upright seam supports, while flat roofs may require ballast or bonding systems.
    • Ground Installations: Ensure that the ground is level and stable to support the brackets.
  2. Choose the Right Brackets
    Select brackets that are compatible with your solar panels and mounting surfaces. For example:

    • Tilt Brackets: Ideal for optimizing the angle of solar panels on flat roof or ground systems.
    • Standing Seam Clamps: Secure panels to metal roofs without drilling.
      SIC Solar offers a variety of bracket options to meet different requirements.
  3. Prepare the Mounting Surface

    • Clean the surface to remove dirt or debris.
    • Mark the location where the bracket will be installed to ensure proper alignment.
  4. Install the Brackets

    • For drilling systems, use screws or bolts to securely secure the bracket to the roof or ground. Make sure the borehole is properly sealed to prevent leaks.
    • For non-drilling systems, such as ballast brackets or bonded brackets, place the brackets according to the design specifications.
  5. Attach the Solar Panels

    • Secure the solar panels to the brackets using mid and end clamps. Adjust the positioning to align the panels with the mounting structure.
    • Tighten all connections to ensure the panels are stable and won’t move in high winds.
  6. Check Stability
    Check the entire system to ensure that the brackets and panels are firmly fixed. Test the structure's resistance to external forces such as wind or weight.


Best Practices for Using Solar Mounting Brackets

  1. Angle Optimization
    Adjust the bracket to position the solar panel at the ideal tilt angle, which varies by geography. The right angle maximizes sunlight exposure, resulting in increased energy production.

  2. Weatherproofing

    • Use corrosion-resistant brackets and fasteners to ensure long-lasting performance.
    • Apply sealant when necessary, especially for roof installations, to prevent leakage.
  3. Regular Maintenance
    Periodically inspect the brackets for signs of wear, rust, or looseness. Tighten any loose parts and replace damaged brackets promptly.

  4. Customization
    For unique installations, such as solar carports or balcony systems, custom brackets may be required. SIC Solar specializes in providing tailor-made solutions for a variety of project needs.


Advantages of Using High-Quality Solar Mounting Brackets

  1. Stability and Durability

    The well-designed bracket securely holds the solar panels in place, even in extreme weather conditions.

  2. Efficiency Optimization
    The adjustable stand allows users to fine-tune the panel angle to ensure maximum capture of solar energy.

  3. Ease of Installation
    Modern brackets are designed for quick and straightforward installation, saving time and labor costs.

  4. Versatility
    Solar mounting brackets come with options for different surfaces and mounting styles, adapting to a variety of projects.


How SIC Solar Supports Solar Mounting Needs

SIC Solar offers best-in-class photovoltaic installation solutions, including a wide range of solar mounting brackets. Its products are designed to be rugged, easy to use and compatible with a wide range of solar panel types. SIC Solar is committed to quality and innovation, ensuring reliable performance in all installation scenarios, whether on the roof, ground or custom structures.

How Should Solar Panels Be Mounted?

Installing solar panels is a meticulous process that significantly impacts their performance, longevity, and safety. Whether you're setting them up on your rooftop, the ground, or a bespoke structure, the right mounting system is crucial for securing your solar array and ensuring it captures the maximum amount of sunlight.

When it comes to mounting solar panels, there are several key considerations:

1. Location and Orientation: To maximize sunlight exposure, panels should face the direction that gets the most sun. Typically, in the Northern Hemisphere, this means a south-facing orientation. The tilt angle should also be adjusted to match the local latitude for peak efficiency.

2. Mounting Surface: The type of surface you're mounting on—be it a rooftop, which can vary from metal to shingle to tile, or the ground—dictates the kind of mounting system you'll need.

3. Wind and Snow Loads: Your mounting system must be robust enough to handle local weather conditions, including strong winds and heavy snowfall.

4. Accessibility: It's important that the panels remain accessible for maintenance and cleaning without compromising safety.

5. Type of Mounting System: Depending on the scale of your project, your budget, and your performance objectives, you'll choose between a fixed or adjustable mounting system.

Common types of solar panel mounting systems include:

- Rooftop Mounting Systems: These can be flush-mounted for a sleek look or tilted for better sunlight exposure. Ballasted mounts are also an option, offering a non-penetrating solution for flat roofs.

- Ground Mounted Systems: Fixed-tilt frames are suitable for year-round performance, while tracking systems follow the sun's path to boost energy production.

- Custom Mounting Solutions: These can include carports, pergolas, or balcony mounts, offering creative ways to integrate solar panels into various structures.

Here's a step-by-step guide to mounting solar panels:

1. Prepare the Site: Assess the site for optimal sunlight and structural soundness, and clear any obstacles that might cast shadows.

2. Select the Mounting System: Choose a system that fits your installation surface and project needs. SIC Solar offers a variety of solutions, from roof hooks to ground screws and ballasted systems.

3. Install the Mounting Structure: Attach the mounting system securely to the roof or ground, ensuring it's level and properly aligned for panel placement.

4. Mount the Solar Panels: Securely fasten the panels to the mounting rails using the appropriate hardware. Ensure each panel is fixed and angled correctly to capture the most sunlight.

5. Connect Electrical Components: Wire the panels to the inverter or charge controller, adhering to safety guidelines to prevent hazards.

6. Test the System: Conduct a thorough inspection to ensure stability and functionality, and monitor the energy output to confirm optimal performance.

High-quality mounting systems play a vital role in:

- Structural Stability: They protect against environmental forces like wind and snow.

- Efficient Performance: They maintain the best angle and orientation for sunlight capture.

- Long-Term Durability: They're made from materials that resist corrosion and wear over time.

SIC Solar specializes in providing mounting systems that meet these criteria. They offer:

- Rooftop Mounting Kits: Compatible with various roof types, including corrugated metal and tile.

- Ground-Mount Frames: Sturdy and adaptable to different terrains.

  • Custom Solutions: Tailored designs for unique projects, such as carports and pergolas.

solar ground mounting structure

Mounting solar panels correctly is essential for achieving the best energy efficiency and system life. By taking into account factors like location, orientation, and weather conditions, you can select the most suitable mounting system for your solar project. SIC Solar innovative and durable mounting solutions ensure that your solar panels are installed securely and are optimized for performance, whether you're working on a residential rooftop or a large-scale ground-mounted system. SIC Solar has the expertise and products to support your renewable energy objectives.

How to attach solar panels to roof without drilling?

Installing solar panels on your roof is a smart investment to achieve energy efficiency and sustainability. However, many property owners are concerned about the damage that can be caused by drilling into your roof for installation. Fortunately, there are several non-intrusive installation options available that can ensure stability without compromising the integrity of your roof. These methods are particularly effective for flat or metal roofs and are becoming increasingly popular in residential and commercial applications.


Why Avoid Drilling?

Drilling holes in rooftops can pose risks, including:

  • Leaks: Penetration of the roof surface can allow water to seep in, causing potential water damage.
  • Structural Compromise: Repeated drilling or improper sealing can weaken the roof's structure.
  • Aesthetic Concerns: Visible mounting points can alter the appearance of the roof, which is particularly problematic for certain architectural designs.

By choosing a non-drilling installation solution, these issues can be avoided while still achieving a safe and efficient solar installation.


Non-Drilling Mounting Solutions

  1. Ballasted Mounting Systems
    The ballast system is designed to hold the solar panels in place using heavy objects rather than penetrating the roof. Heavy materials such as concrete blocks hold the mounting frame in place.

    • Best For: Flat roofs that allow for weight distribution.
    • Advantages: Easy installation, no damage to the roof, flexible layout.
    • Example: SIC Solar offers a ballast installation system that features a lightweight frame and durable materials, making it ideal for flat roof solar installations.
  2. Standing Seam Clamps
    For metal roofs with vertical seams, special clamps can be used to attach the solar panels directly to the seams without drilling holes. These clamps provide a firm grip while protecting the roof surface.

    • Best For: Standing seam metal roofs.
    • Advantages: No need to penetrate the roof, easy to adjust or remove the panels.
  3. Weighted Solar Carports or Canopies
    For properties with limited roof space or concerns about roof integrity, solar carports or ground-mounted systems can be an alternative. While these brackets are not directly attached to the roof, they provide a sustainable energy solution without penetrating the roof.

solar panel clips for metal roof


Key Considerations for Non-Drilling Solar Installations

  1. Wind Resistance
    Non-drilling solutions must account for the lifting force of the wind to prevent the panels from moving or falling off. For example, ballast systems are designed with aerodynamic profiles to minimize wind resistance.

  2. Load Capacity
    The load-bearing capacity of flat roofs must be evaluated to ensure that they can withstand the additional load of ballast or bonding systems.

  3. Durability and Maintenance
    Non-drilling supports should be made of corrosion-resistant materials to withstand various weather conditions. Regular inspections are also necessary to ensure long-term stability.

  4. Customization
    Every roof is unique, so it is crucial to choose a system that fits the specific layout, angle and material of the roof. SIC Solar specializes in custom installation solutions to meet these individual needs.


Benefits of Non-Drilling Solutions

  • Preserve Roof Integrity: No holes means less risk of leaks or structural damage.
  • Flexibility: Non-invasive systems are easier to modify, relocate, or remove as needed.
  • Cost-Effective: Avoid potential repair costs due to roof damage caused by drilling.
  • Aesthetic Appeal: Maintains the original appearance of the roof while seamlessly integrating solar panels.

How SIC Solar Supports Non-Drilling Installations

SIC Solar is a leading supplier of photovoltaic installation systems, offering a range of non-drilling solutions tailored for flat and metal roofs. Their installation systems feature the following designs:

  • Durable Materials: Corrosion-resistant aluminum and stainless steel components.
  • Aerodynamic Designs: Enhanced stability against wind loads.
  • Custom Configurations: Tailored solutions for a variety of roof types and layouts.

With SIC Solar expertise, homeowners can enjoy the benefits of solar energy without having to worry about roof damage or complex installations.


Installing solar panels onto a roof without having to drill holes is a practical and effective way to harness renewable energy while maintaining the integrity of the roof. From ballast systems to adhesives and magnetic brackets, there are a variety of options to suit different roof types and project requirements. By partnering with innovative suppliers such as SIC Solar, achieving sustainable and non-invasive solar installations is easier than ever.

How to Install Solar Panels on Corrugated Metal Roofing?

Corrugated metal roofs are a popular choice for solar installations due to their durability, lightweight nature, and adaptability. However, installing solar panels on this type of roofing requires a tailored approach to ensure secure mounting and long-term efficiency.

solar metal roof mounts


Key Considerations for Installing Solar Panels on Corrugated Metal Roofing

  1. Roof Material and Structure
    Corrugated metal roofs are typically made of steel or aluminum, which are robust and ideal for supporting solar panel installations. However, it’s essential to assess the roof's load-bearing capacity and condition before proceeding.

  2. Roof Profile
    The wavy pattern of corrugated roofs requires mounting systems that align with their unique contours. Proper attachment points and clamps must be used to avoid compromising the roof’s structure.

  3. Waterproofing
    Ensuring a watertight installation is crucial. Mounting systems must be designed to avoid leaks, especially in areas prone to heavy rainfall.

  4. Thermal Expansion
    Metal roofs expand and contract with temperature changes. A mounting system should allow for this movement without stressing the panels or roof.


Steps for Installing Solar Panels on Corrugated Metal Roofing

  1. Site Assessment
    Conduct a thorough inspection of the roof to evaluate its structural integrity, orientation, and shading. This helps determine the optimal placement of solar panels for maximum energy output.

  2. Choose the Right Mounting System

    • Clamps and Brackets: Specialized clamps designed for corrugated roofs attach directly to the raised seams without penetrating the roof surface.
    • Rails or Rail-Free Systems: Depending on the project, you can use traditional rail systems or opt for rail-free systems to reduce material usage and installation time.
    • Pre-Assembled Solutions: Companies like SIC Solar offer pre-assembled mounting kits specifically designed for corrugated metal roofs, streamlining the installation process.
  3. Mark Attachment Points
    Identify and mark the attachment points where the mounting brackets will be secured. These points are typically on the raised ridges of the corrugated roof to avoid water pooling around the mounting hardware.

  4. Install Mounting Hardware

    • Use stainless steel screws or bolts to attach the mounting brackets to the roof. Ensure they align with the roof’s corrugated profile and provide a firm base for the panels.
    • Add rubber gaskets or waterproof washers to seal any penetrations and prevent leaks.
  5. Attach Rails or Rail-Free Systems
    Secure the mounting rails (if used) to the brackets. Ensure they are level and positioned correctly to support the solar panels. Rail-free systems eliminate the need for rails and directly attach the panels to the mounting clamps.

  6. Install Solar Panels
    Place the solar panels on the rails or clamps and secure them using mid-clamps and end clamps. Adjust the tilt and orientation of the panels to maximize sun exposure.

  7. Wire the Panels
    Connect the solar panels to the inverter or charge controller following the manufacturer's instructions. Proper cable management is critical to ensure safety and minimize wear over time.

  8. Testing and Inspection
    Once installed, test the system to confirm its performance and inspect the roof for any signs of stress or leaks.


Why SIC Solar Mounting Systems for Corrugated Metal Roofs?

SIC Solar provides innovative mounting solutions tailored for corrugated metal roofs, ensuring a secure, efficient, and durable installation.

  • Custom Fit Designs: SIC Solar’s mounting systems are designed to match the contours of corrugated roofs, minimizing installation challenges.
  • High-Quality Materials: With corrosion-resistant aluminum and stainless steel components, their systems ensure longevity even in harsh environments.
  • Ease of Installation: Pre-assembled components and detailed guides make installations faster and more straightforward.
  • Adaptability: SIC Solar offers mounting systems compatible with both rail-based and rail-free designs, giving flexibility to meet specific project needs.

Benefits of Solar Panels on Corrugated Metal Roofs

  1. Lightweight: Metal roofs can support the added weight of solar panels without significant reinforcement.
  2. Durability: Metal roofing materials often last 40+ years, matching or exceeding the lifespan of solar panels.
  3. Eco-Friendly: Solar panels paired with a recyclable metal roof create a sustainable energy solution.

Corrugated metal roofs are well-suited for solar installations when equipped with the right mounting system. By working with experts like SIC Solar, you can ensure a reliable and efficient setup tailored to your roof's unique profile. From clamps to rail systems, their solutions provide the strength and adaptability needed for long-lasting performance.

How to Mount a Solar Panel to a Wall?

Installing solar panels on walls has become an innovative way to utilize limited rooftop space or utilise vertical surfaces. Whether for residential or commercial installations, wall-mounted solar panels offer a practical solution for harnessing solar energy in urban environments or areas with unique design considerations.

Why install solar panels on walls?

Wall-mounted solar panels are an excellent alternative to traditional rooftop installations for the following reasons:

Limited roof space: Ideal for buildings with insufficient or inappropriate roof space.

Aesthetic appeal: Wall-mounted panels can be integrated into modern architectural designs.

Improved sun exposure: Vertical installation can maximize solar efficiency in areas with highly variable sun angles.

Dual function: Panels can act as shading devices or add extra insulation to a building.

Key Considerations for Wall-Mounted Solar Panels

Direction and inclination:

Compared to rooftop-mounted systems, solar panels on walls are typically less flexible in terms of tilt angles.

Choose a wall facing south (in the northern hemisphere) or a wall facing north (in the southern hemisphere) to maximize the use of sunlight.

Structural integrity:

Make sure the wall can withstand the weight of the panels and mounting system.

Conduct structural analysis, especially for older or less stable buildings.

Ventilation:

Allow proper air circulation behind the panels to prevent overheating and optimize efficiency.

Installation system:

Use sturdy and weather-resistant brackets or rails.

Make sure the installation system meets local building and safety codes.

Steps to install solar panels on a wall

1. Evaluate walls and locations

Select the wall with the least amount of light throughout the day.

Check for any obstructions such as windows, vents, or pipes.

2. Select the appropriate installation system

Use mounting brackets designed for vertical mounting.

SIC Solar offers reliable wall-mounted solutions that combine durability with ease of installation.

3. Mark the installation points

Determine the installation layout according to the size and number of panels.

Use a level to ensure alignment.

4. Fixed mounting bracket

Drill holes in the wall at the marking point.

Secure the mounting bracket firmly to the wall using anchors and bolts.

Make sure the brackets are level and spaced properly to distribute the weight of the panel evenly.

5. Install rails or fixtures

According to the mounting system, install the guide rail or fixture to the bracket.

Check carefully whether the guide rail is firmly fixed to the bracket.

6. Install solar panels

Carefully place the solar panels on rails or brackets.

Use end clamps and intermediate clamps to hold the panels in place.

Check that the panels are properly aligned and free of obstacles.

7. Connect lines

Connect the wiring of the solar panel to the inverter or charge controller.

Use cable management solutions to keep wires clean and protected from environmental factors.

8. Test system

After installing and connecting all the panels, test the system to ensure optimum performance.

Advantages of SIC Solar Wall Mounted Systems

SIC Solar offers high-quality installation solutions designed to meet the unique challenges of wall-mounted solar installations. Its product features:

Durable materials: Corrosion-resistant aluminum and stainless steel ensure long-lasting performance.

Versatility: Suitable for a variety of panel sizes and wall types.

Easy to install: Pre-assembled components reduce installation time and effort.

Aesthetic design: The slim shape blends seamlessly with the building facade.

By partnering with SIC Solar, you can achieve reliable and efficient wall-mounted solar systems that meet your energy goals.

solar panels on a wall

Installing solar panels on walls is a practical and effective way to use solar energy, especially for buildings with limited roof space or unique architectural designs. By following the right installation techniques and using high-quality installation systems like SIC Solar, you can create durable and beautiful solar installations.

Whether you're considering wall-mounted solar panels for residential or commercial use, investing in reliable materials and expertise ensures long-term success. Discover SIC Solar's innovative solutions to find the perfect installation system for your project.

The Role of Solar Roof Hooks in Enhancing Solar Panel Efficiency

Solar power is becoming increasingly popular among homeowners and businesses. An important but often overlooked component of a pitched roof solar system is the solar roof hook. These small but important components play a major role in ensuring the stability, efficiency, and longevity of your solar panels.

pitched roof solar


What are Solar Roof Hooks?

Solar roof hooks are mounting components designed specifically for pitched roofs, especially tiled roofs. They act as a secure connection point between the roof and the mounting system, ensuring that the solar panels are securely attached without compromising the integrity of the roof.


How Solar Roof Hooks Improve Efficiency

  1. Maintain Optimal Alignment of Modules
    Roof hooks provide a stable foundation for the mounting rails, which is essential for aligning solar modules at the optimal tilt angle. Proper orientation maximizes solar radiation, increasing energy production. Without secure hooks, misaligned modules can significantly reduce efficiency.

  2. Minimize Roof Damage
    A poorly executed solar system can cause roof leaks or structural issues that reduce the efficiency of your solar system over time. Solar roof hooks are designed to minimize roof penetration through pre-drilled points and sealing materials that protect the roof structure.

  3. Ensure System Stability
    Stability is critical to maintaining efficiency. Roof hooks secure the mounting system, preventing panels from moving due to wind or vibration. Even slight movement can disrupt the alignment and reduce energy output.

  4. Ensure Adequate Ventilation
    Solar panels work better when they are cool. Roof hooks raise the panels slightly above the roof surface to allow for air circulation underneath. This ventilation prevents panels from overheating and ensures consistent performance.

  5. Adapts to different roof types
    Roof hooks are versatile and therefore adaptable to different tile designs (flat, curved or interlocking). Thanks to their compatibility with a wide range of roof structures, they ensure efficient and sustainable installations regardless of the roof type.


Types of solar roof hooks

  1. Standard tile roof hooks
    Designed for flat or slightly curved tiles, these hooks are sturdy and easy to install.

  2. Adjustable roof hooks
    These provide flexibility for roofs with irregular surfaces or non-standard tiles.

  3. Heavy duty roof hooks
    Heavy duty hooks are ideal for areas with high wind loads or heavy snow and provide extra strength and stability.

  4. Flat style hooks

    These hooks are used for installations where aesthetics are paramount, providing an elegant, understated look.


Important Considerations When Selecting a Roof Hook

  • Roof Type: Make sure the hook is compatible with the material and design of the roof tiles.
  • Load Requirements: Choose a hook that can withstand local wind and snow loads.
  • Material Quality: High-quality stainless steel or aluminum ensures durability and corrosion resistance.
  • Easy Installation: Hooks with pre-drilled holes and adjustable features simplify the installation process.

SIC Solar ​​Expertise in Solar Roof Hooks

SIC Solar is a leading manufacturer of PV mounting systems, including high-quality roof hooks. Their products are tailored for a variety of roof types and project requirements.

  • Durable Materials: SIC Solar uses corrosion-resistant materials such as stainless steel to ensure long-lasting performance.
  • Customizable Solutions: Whether it’s a flat tile, curved tile, or metal roof, SIC Solar offers a tailored solution for every installation.
  • Easy to Install: Hooks are designed for quick and safe installation, saving time and reducing labor costs.

With SIC Solar ​​reliable roof hooks, installers can achieve a stable, efficient, and aesthetically pleasing solar panel installation.


Solar roof hooks may be small components, but they play a vital role in improving the overall efficiency of your solar panel system. By ensuring optimal alignment, stability, and roof integrity, these hooks make a significant contribution to the long-term performance of your solar system.

With industry leaders like SIC Solar providing innovative and long-lasting roof hook solutions, homeowners and commercial customers can be confident that their solar systems will operate efficiently for years to come.

What is a Solar Carport?

A solar carport is a structure that combines the benefits of a car shelter with solar power. Unlike traditional carports, which provide shade and weather protection for parked vehicles, solar carports have solar panels installed on top. This setup turns the parking lot into a power station, providing both energy and utilities.

high quality aluminum waterproof carport mounting system

How does a solar carport work?

Solar carports work similarly to rooftop solar installations. Solar panels are mounted on top of the carport, angled to capture maximum sunlight. The panels then convert sunlight into electricity, which can be used to power buildings, charge electric vehicles (EVs) or be stored in battery systems. By turning parking lots into energy, solar carports offer an efficient way to generate electricity without taking up additional ground or roof space.

Benefits of installing a solar carport

  1. Efficient use of space One of the most significant benefits of a solar carport is its ability to turn an unused parking space into a usable power source. Solar carports require no additional land, making them ideal for urban areas, commercial lots and residential settings where space is limited.
  2. Vehicle Protection Solar carports provide shade, reduce heat build-up on parked vehicles, and protect vehicles from UV rays, rain and snow. This extra layer of protection can extend the life of your vehicle while also improving interior comfort.
  3. Energy Production and Conservation Solar carports produce clean, renewable energy that helps reduce dependence on grid power, ultimately lowering electricity costs. By using energy generated on their own property, businesses and homeowners can save on energy bills in the long term. Some commercial facilities even have car charging stations under solar carports, making it easier for electric vehicle owners to use solar charging.
  4. Sustainable Green Energy Since solar energy is renewable, solar carports are an environmentally friendly way to meet your energy needs. They can significantly reduce a building's carbon footprint, providing clean energy that helps lower greenhouse gas emissions. SIC Solar's carport mounting systems are designed with durability and sustainability in mind, providing a reliable foundation for solar power generation.
  5. Income Generation For commercial parking lots, solar carports can serve as an additional source of income. By offering solar-powered electric vehicle charging stations, businesses can attract electric vehicle customers and potentially charge fees for use of the charging stations. Additionally, if excess energy is generated, it can be sold back to the grid in certain areas, creating an additional revenue stream.

Solar carport design types

  1. Single Row Carports Single row carports are suitable for smaller parking areas and are typically used on residential or smaller commercial premises. They cover a row of parking spaces, providing shade and power generation to a limited area.
  2. Double-Row Carports Double-Row Carports are designed to cover two rows of parking spaces and are typically used on commercial lots. They maximize energy production and provide more shade, making them ideal for larger spaces.
  3. Cantilever Carports Cantilever solar carports are supported on posts on only one side, improving vehicle accessibility and maneuverability. These designs provide excellent structural stability and reduce the number of columns, creating a more open layout.

Things to note when installing a solar carport

  1. Site Analysis Proper site analysis is crucial before installing a solar carport. Factors such as sunlight, shading from nearby buildings and available space can all affect installation. Conducting a shading analysis and positioning the carport to receive the most sunlight will optimize energy production.
  2. Structural Requirements A solar carport must be designed to bear the weight of the solar panels and withstand weather conditions. SIC Solar offers sturdy mounting systems for solar carports with high load-bearing capacity and corrosion-resistant materials to ensure a long-lasting installation.
  3. Angle and Orientation To capture maximum sunlight, solar panels on a carport should be angled and positioned correctly. Typically, the optimal angle matches the latitude of the site, but adjustments may need to be made based on specific requirements.
  4. Electrical connection The energy generated by the solar carport must be connected to the building's electrical system or to the external grid. Proper wiring and inverter installation are critical for safe and efficient energy transfer, and battery storage can be added for enhanced energy management.

Application of solar carport

  1. Commercial Parking Lots Solar carports in commercial parking lots serve a dual purpose, providing shade and generating electricity. They are popular in office buildings, shopping malls and municipal parking lots with plenty of open parking spaces. Additionally, installing electric vehicle charging stations under solar carports can attract more visitors and generate additional revenue.
  2. Residential Properties Homeowners can install smaller solar carports to generate electricity for home use, reduce energy bills, and provide shelter for their vehicles. Residential solar carports are a great way to enjoy the benefits of solar energy without having to modify the main roof structure.
  3. Educational and Governmental Institutions Schools, universities and government buildings often have extensive parking lots suitable for installing solar carports. These facilities not only provide clean energy but also serve as educational tools to raise awareness about renewable energy and sustainability.

SIC Solar ​​expertise in solar carport installation systems

With experience in producing high-quality mounting systems for a wide range of solar installations, SIC Solar offers solutions specifically designed for solar carports. Their mounting systems are designed to withstand a variety of environmental conditions, ensuring that solar carports are durable, safe, and efficient. SIC Solar products focus on adaptability, supporting a variety of solar carport designs to suit residential and commercial needs.

What Is Ballast Mounting?

Ballast installation is a widely used method of solar panel installation, especially on flat roofs, as drilling holes in the roof structure is not ideal or feasible. The system does not penetrate the roof, but relies on weighted objects or ballast to hold the solar panels in place. Ballast installation systems offer a non-invasive, flexible and effective solution for solar installations, making it a popular choice for residential, commercial and industrial projects.

durable ballasted standard flat roof solar mounting


The working principle of ballast installation

Ballast mounting systems use heavy materials such as concrete blocks or steel plates to counteract wind loads and other environmental forces to hold solar panels in place. These ballasts are carefully placed to ensure the stability of the system without damaging the roof surface.

Usually, the system includes:

  1. Mounting Frames: Designed to support solar panels at the optimum angle to generate energy.
  2. Ballasts: A weighted block that provides stability and prevents the panels from moving or rising due to wind.
  3. Protective Layers: Materials such as rubber mats are usually placed under the mounting frame to prevent damage to the roof.

Companies such as SIC Solar design lightweight and durable ballast mounting systems to adapt to different roof types and environmental conditions.


The advantages of ballast installation

  1. Non-Invasive Installation
    Ballast systems do not require drilling or penetrating roof membranes, thus maintaining their integrity and preventing potential leaks. This feature makes them ideal for buildings with sensitive roofing materials or structures that do not support penetrating systems.

  2. Ease of Installation
    Ballast installation systems are faster and simpler to install than traditional systems, thus reducing labor costs and installation time.

  3. Flexibility in Design
    These systems can be easily adjusted or repositioned to make them suitable for rooftops with obstacles such as HVAC systems, vents, or irregular layouts.

  4. Cost-Effective Maintenance
    Since the roof remains intact, maintenance is simpler and cheaper, especially when compared to systems that require penetration.

  5. Compatibility with Flat Roofs

    Ballast installations are particularly effective on flat roofs because it is easier to distribute the weight evenly and position the panels for maximum energy production.


Considerations for Ballast Mounting

Although ballast systems offer many advantages, there are still a few factors to consider to ensure optimum performance:

  1. Weight Limitations

    The total weight of the ballast and installation system shall not exceed the load-bearing capacity of the roof. Consulting a structural engineer is essential for safety and compliance.

  2. Wind Load
    The design must take into account the wind speed in the installation area to prevent movement or damage. SIC Solar's aerodynamic ballast design minimizes wind resistance and provides additional stability.

  3. Roof Drainage
    The ballast system should not obstruct the drainage system or cause water accumulation, otherwise it may cause the roof to break down over time.

  4. Tilt Angle
    Ballast mounting systems typically provide a fixed tilt angle. While this simplifies the design, selecting the optimum energy production angle is critical for long-term efficiency.


Types of Ballast Mounting Systems

  1. Standard Ballast Systems
    These are simple designs where ballast holds the frame at a predetermined angle. They are widely used due to their simplicity and cost-effectiveness.

  2. East-West Ballast Systems

    These systems face the panels east-west instead of south. This layout minimizes inter-row shading and maximizes the day's energy output.
  3. Custom Ballast Systems
    Customized solutions, such as those offered by SIC Solar, can be tailored to meet specific roof types, climate and energy requirements. These systems are tailored to achieve optimum performance and efficiency.


Why Choose SIC Solar for Ballast Mounting?

SIC Solar is a leading manufacturer of photovoltaic installation systems, offering innovative solutions for flat roof solar installations. Their ballast installation systems have the following characteristics:

  • Corrosion-Resistant: Made of durable materials that can withstand severe weather conditions.
  • Lightweight and Stable: Designed to balance load requirements and stability.
  • Easy to Install: Designed for quick assembly, reducing labor time and cost.

SIC Solar works closely with customers to provide customized solutions to ensure that each project meets its energy goals efficiently and reliably.


Applications of Ballast Mounting Systems

Ballast mounting systems are suitable for a variety of installations, including:

  • Commercial and Industrial Buildings: Flat roofs for factories, warehouses, and office buildings.
  • Residential Properties: For homeowners with flat or low pitched roofs.
  • Temporary Installations: Ideal for situations where the system may need to be relocated or dismantled in the future.