What Role Does Hydrogen Storage Play in Energy Independence and Security?

1. Balancing Renewable Energy Supply and Demand

Renewable energy sources like solar and wind are intermittent, meaning their output varies with weather conditions and time of day. Hydrogen storage allows excess energy generated during peak production periods to be stored and used later when production is low, ensuring a stable and reliable energy supply.


2. Decentralizing Energy Production

Hydrogen can be produced locally using renewable energy sources, reducing reliance on centralized power grids and imported fossil fuels. This decentralization enhances energy independence by allowing regions or even individual communities to generate and store their own energy.


3. Reducing Dependence on Fossil Fuels

By storing energy in the form of hydrogen, countries can reduce their dependence on fossil fuels for electricity generation, transportation, and industrial processes. This shift not only enhances energy security but also reduces vulnerability to global oil and gas price fluctuations and supply disruptions.


4. Enabling Long-Term Energy Storage

Unlike batteries, which are typically suited for short-term storage, hydrogen can be stored for long periods without significant energy loss. This makes it an ideal solution for seasonal energy storage, ensuring a continuous energy supply even during extended periods of low renewable energy generation.


5. Diversifying Energy Sources

Hydrogen adds diversity to the energy mix, reducing reliance on a single energy source or technology. This diversification strengthens energy security by making the energy system more resilient to disruptions in any one sector.


6. Supporting Energy Export and Trade

Hydrogen can be transported and exported, much like natural gas or oil. Countries with abundant renewable resources can produce hydrogen and export it to energy-deficient regions, creating new economic opportunities and strengthening global energy security.


7. Enhancing Grid Stability and Resilience

Hydrogen storage can provide grid services such as frequency regulation and backup power, improving the stability and resilience of the energy grid. This is particularly important as the share of variable renewable energy sources increases.


8. Facilitating the Transition to a Low-Carbon Economy

Hydrogen storage supports the integration of renewable energy into the grid, accelerating the transition to a low-carbon economy.


9.  Providing Energy for Hard-to-Decarbonize Sectors

Hydrogen can be used in sectors that are difficult to electrify, such as heavy industry, aviation, and shipping. By providing a clean energy alternative in these sectors, hydrogen storage helps reduce overall fossil fuel dependence and enhances energy security.


Hydrogen storage is a versatile and strategic tool for achieving energy independence and security. It enables the effective use of renewable energy, reduces reliance on fossil fuels, and supports a resilient and diversified energy system. As countries around the world strive to meet their climate goals and enhance energy security, hydrogen storage will play an increasingly important role in the global energy landscape.

Indian Customer Sithi Came to Carry Out Lithium Battery Cargo Inspection

Accompanied by the factory manager, the Indian customer went deep into the production workshop to learn more about the production process, quality control system and technological innovation of lithium batteries. The factory's professional technical team gave a comprehensive explanation to the customer on key indicators such as the performance advantages, safety measures and service life of lithium batteries, and demonstrated the product's charging and discharging performance and stability test on site.


Indian customers expressed high satisfaction with this inspection work and fully affirmed the professional level and rigorous attitude of Hefei Jubao New Energy Tech Co., Ltd. The two parties also had an in-depth discussion on the future expansion of cooperation in the Indian market, and look forward to bringing more high-quality and reliable lithium battery solutions to Indian consumers through continuous technological innovation and product optimization, and jointly promoting the vigorous development of the new energy industry in India.


This factory inspection not only deepened the mutual trust between the two parties, but also laid a solid foundation for Hefei Jubao New Energy Tech Co., Ltd. to further expand its overseas market. In the future, Hefei Jubao New Energy Tech Co., Ltd. will continue to uphold the concept of high-quality development, continuously improve product quality and service level, and work with global partners to create brilliance together.

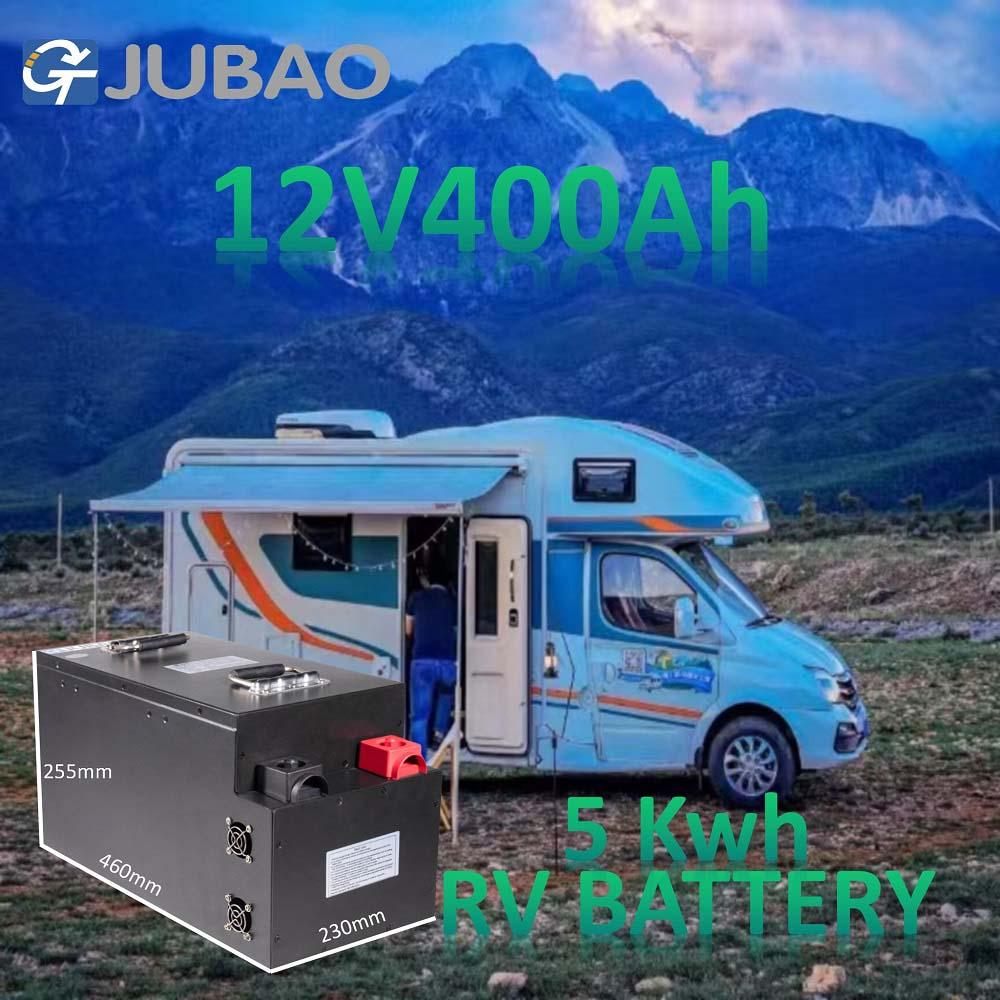
The 12V400Ah 5Kwh Battery Pack for RVs of Jubao New Energy Is Here!

 The 12V400Ah 5Kwh Battery Pack for RVs of Jubao New Energy Is Here! 

Jubao New Energy has brought you a new surprise - the newly produced 12V400Ah 5Kwh battery pack for RVs has made a brilliant debut!

We have a deep cooperation with Gotion, introducing its advanced technology and strict quality control system to carefully create high-quality battery products.

The biggest highlight of this battery pack is the amazing large capacity. The 5Kwh energy reserve is like a powerful energy treasury for your RV. It can easily meet various power demands on the RV, whether it's for lighting, cooking, or using various electrical appliances. With it, you don't need to worry about insufficient power during the journey. Whether it's a long-distance trip or camping in the wild, it can continuously and stably provide sufficient power support for your RV. Choosing this battery pack of Juba New Energy means choosing high quality and starting a worry-free RV journey. Come and experience it and enjoy the infinite wonderfulness of RV life!


Jubao New Energy

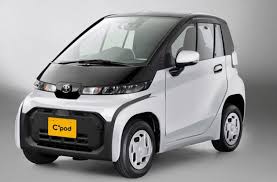
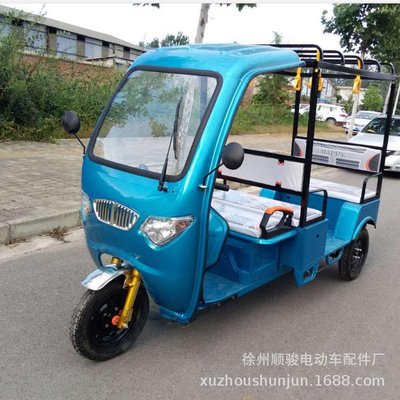
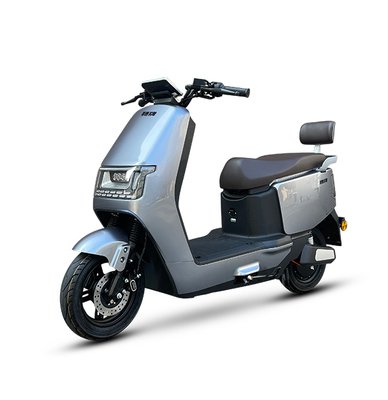
Tips to make your low-speed vehicle battery last longer!

Do you own a low-speed vehicle, such as an electric bike or electric scooter? If so, you may find that Low-Speed Vehicle Battery life becomes a worrying issue. Fortunately, we have some simple ways to help you maintain and extend the life of your low-speed vehicle battery. Let's find out together!


Avoid overcharging and discharging: When using a low-speed vehicle, try to avoid overcharging and discharging the battery. Overcharging can cause the battery to overheat and lose capacity, while over-discharging can damage the battery's performance. So, when the battery is close to being exhausted, charge it in time to avoid long-term discharge or over-discharge.


Proper charging method: When charging, it is also important to choose the appropriate charging method. Use the charger provided by the original manufacturer or certified charging equipment, and avoid using an inappropriate charger to avoid damage to the battery.


Avoid high and low temperature environments: Batteries are sensitive to temperature, and too high or too low temperatures will have a negative impact on battery life. When storing batteries, choose a dry, ventilated place with a suitable temperature. In extreme weather conditions, try to avoid exposing the battery to overheating or over-cold environments for a long time.


Regular battery maintenance: Check the appearance and connection lines of the battery regularly to ensure that there is no damage or rust. Keep the battery dry and clean to prevent moisture from entering the battery. If you find any problems with the battery, ask a professional to repair or replace it in time.


Reasonable use of low-speed vehicles: The life of the battery of a low-speed vehicle is closely related to the way it is used. Try to avoid overloading and do not drive continuously at high speed for a long time. Reasonable use of low-speed mode and energy-saving mode can reduce the pressure on the battery and extend the battery life.


Fully charge and discharge: Try to keep the battery in the medium power range. Too frequent partial discharge and charging will cause additional pressure on the battery. So, don't always wait until the battery power is very low before charging, and don't always use the battery immediately after it is fully charged. Moderate charging and discharging is beneficial to extend the battery life.


By paying attention to the above tips, you can extend the life of the battery of a low-speed vehicle. Remember, maintaining the good condition of the battery is essential to ensure the reliability and long-term use of low-speed vehicles. I hope these tips can help you and enjoy longer low-speed travel!

What are low-speed vehicle batteries and how do they differ from traditional car batteries?

With the increasing awareness of environmental protection and the demand for renewable energy, low-speed vehicle batteries have become a highly sought-after energy solution. Compared with traditional automotive batteries, low-speed vehicle batteries are very different in design and purpose.


First, low-speed vehicle batteries usually use lithium battery technology, while traditional automotive batteries usually use lead-acid battery technology. Lithium batteries generate current by the migration of lithium ions between positive and negative electrodes, while lead-acid batteries generate current through the chemical reaction between lead and sulfuric acid. Lithium batteries have significant advantages in energy density, charge and discharge efficiency, and life, so they are widely used in low-speed vehicles.


Second, low-speed vehicle batteries usually have a smaller capacity and lower voltage. Low-speed vehicles are mainly used for short-distance travel and urban driving, so the requirements for cruising range and maximum speed are relatively low. The design of low-speed vehicle batteries pays more attention to economy and practicality, using relatively small capacity battery packs to reduce costs and improve energy utilization.


In addition, low-speed vehicle batteries usually use a simpler management system. Traditional automotive batteries require complex battery management systems to monitor battery status, balance charge, and prevent overcharging and over-discharging. The management requirements for low-speed vehicle batteries are relatively low, and generally only simple protection modules are needed to ensure the safe operation of the battery.


In addition, the cost of low-speed vehicle batteries is relatively low. Traditional car batteries are expensive because they need to meet the requirements of high energy density and large capacity. Low-speed vehicle batteries have a smaller capacity and use relatively cheap lithium battery technology, making their cost more controllable and economical.


In summary, low-speed vehicle batteries are an energy solution designed specifically for urban travel and short-distance driving. Compared with traditional car batteries, they use lithium battery technology, simple design, low cost, and focus on economy and practicality. As the demand for sustainable travel increases, low-speed vehicle batteries are expected to be more widely used in the future.

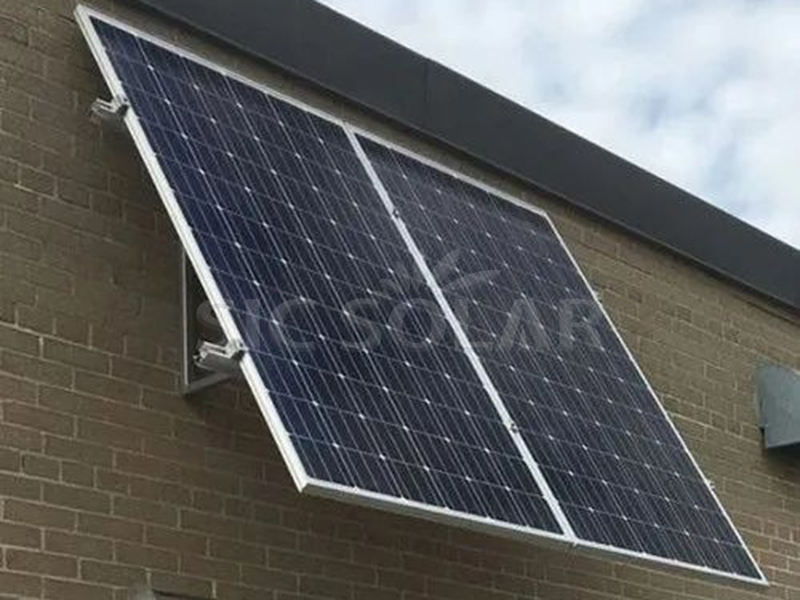
Can I put solar panels on my walls?

As solar energy becomes more popular, people are looking for creative ways to maximize solar panel installation beyond the traditional roof setup. Mounting solar panels on walls offers an alternative for those with limited roof space or specific design goals. But is it effective? 

Why Consider Wall Mounted Solar Panels?

  1. Limited Roof Space: Not every property has an expansive roof suitable for solar panels. Wall-mounted panels provide a solution for buildings with small or shaded roof areas, giving property owners another option to harness solar energy.

  2. Additional Energy Capture: For larger solar needs, such as commercial properties or residential homes with high energy demands, installing panels on both the roof and walls can significantly boost energy production.

  3. Aesthetic and Design: Some owners prefer a certain aesthetic or design, and wall-mounted solar panels can create a sleek, modern look for the property. Strategic wall placement can enhance a building’s facade while serving a functional purpose.

Benefits of Wall Mounted Solar Panels

  • Angle and Sun Exposure: Vertical wall installations can capture sunlight at times when roof panels might be shaded. In certain locations, south-facing walls can maximize solar exposure, especially during winter when the sun is lower in the sky.
  • Reduced Debris Accumulation: Unlike roof panels that may accumulate dirt, leaves, or snow, wall-mounted panels are less prone to debris buildup. This can lower maintenance needs and keep the panels performing well over time.
  • Ease of Maintenance: Panels on walls are generally easier to access than roof panels, making cleaning and maintenance simpler and safer.

Challenges of Wall Mounted Solar Panels

  1. Reduced Efficiency: Wall-mounted panels don’t always receive the optimal sunlight exposure that roof panels get, especially if they face east or west rather than south. The angle also affects their ability to capture sunlight as efficiently, which can lead to lower overall energy production.

  2. Installation Complexity: Mounting solar panels on walls requires different brackets and support structures than roof installations. SIC Solar offers specialized mounting solutions that accommodate different wall types and materials, ensuring a secure and efficient setup.

  3. Aesthetic and Structural Considerations: Wall installations need to account for building aesthetics and structural integrity. The installation team must consider factors like wall material, insulation, and load-bearing capacity to avoid damage. Working with a provider like SIC Solar, which offers custom brackets and mounting systems, can help ensure a seamless fit with minimal impact on the structure.

Ideal Locations for Wall Mounted Panels

  1. South-Facing Walls: In the Northern Hemisphere, south-facing walls receive the most sunlight, especially during the winter months. Panels mounted here can effectively capture sunlight at times when roof-mounted panels may not perform as well.

  2. Commercial Buildings: For larger buildings, including warehouses, hospitals, or schools, vertical solar panels on south-facing walls can make up for limited roof space and meet energy needs with creative placements.

  3. Residential Homes with Shaded Roofs: If trees or other buildings shade the roof, wall-mounted panels could capture more sunlight than roof-mounted panels. These installations allow property owners to maximize energy production despite shading issues.

Types of Wall Mounting Systems

SIC Solar provides a variety of wall-mounting systems designed to support efficient and secure installations on different types of walls. Here’s an overview of popular wall-mounting systems for solar panels:

  • Adjustable Tilt Brackets: Adjustable brackets allow panels to be positioned at the best angle for sunlight exposure, compensating for the lack of tilt on vertical walls.
  • Flush Mounts: These mounts hold panels closely against the wall, minimizing their visual impact and keeping the installation discreet. Ideal for south-facing walls with consistent sunlight, flush mounts maintain a streamlined appearance.
  • Custom Framing: For unique architectural designs or building facades, SIC Solar offers custom frames that integrate solar panels seamlessly into the building’s exterior, maximizing energy production while enhancing aesthetics.

Practical Considerations for Wall Mounted Solar Panels

  1. Angle and Positioning: Wall-mounted panels should ideally face south (in the Northern Hemisphere) to capture the most sunlight. Adjustable mounts that allow tilting can help improve efficiency if the wall’s natural angle isn’t ideal.

  2. Energy Output Expectations: Due to the vertical orientation, expect that wall-mounted panels will produce less energy than roof-mounted panels. An analysis of expected energy output versus the building’s energy needs is essential before committing to wall-mounted solar.

  3. Building Codes and Regulations: Some jurisdictions have building codes that impact where and how solar panels can be installed. Wall-mounted installations may require additional permits, so it’s important to check local regulations.

  4. Working with Experienced Installers: Installing wall-mounted panels can be more complex than roof installations. Companies like SIC Solar provide mounting solutions and guidance for secure installations, but working with an experienced solar installer is critical to ensure structural stability and optimal performance.

SIC Solar Role in Supporting Wall Mounted Solar Installations

SIC Solar offers a range of mounting systems and accessories tailored to non-traditional installations like wall mounts. Known for their high-quality materials and custom design options, SIC Solar systems provide stability, durability, and adaptability. Here’s how SIC Solar can assist in wall-mounted installations:

  • Custom Bracket Options: SIC Solar provides custom-designed brackets that fit different wall types and installation needs, offering flexibility for residential and commercial projects alike.
  • High-Quality Materials: Using materials that withstand various weather conditions, SIC Solar mounts ensure that wall-mounted panels stay secure for long-lasting energy generation.
  • Technical Support: SIC Solar team provides technical support and guidance to ensure installations meet all safety and performance standards, making wall-mounted solar panels a viable option for buildings of all types.

solar panels on walls

Wall-mounted solar panels present a creative solution for maximizing solar energy on properties with limited roof space or aesthetic preferences. While they come with specific challenges, including potential efficiency losses and structural considerations, wall-mounted installations can effectively contribute to a building’s energy needs. By partnering with trusted providers like SIC Solar, property owners can access the right mounting solutions to achieve secure, efficient, and visually appealing wall-mounted solar panel installations. Whether for residential homes, commercial properties, or even urban facades, wall-mounted solar panels are an innovative step toward more flexible solar energy use.

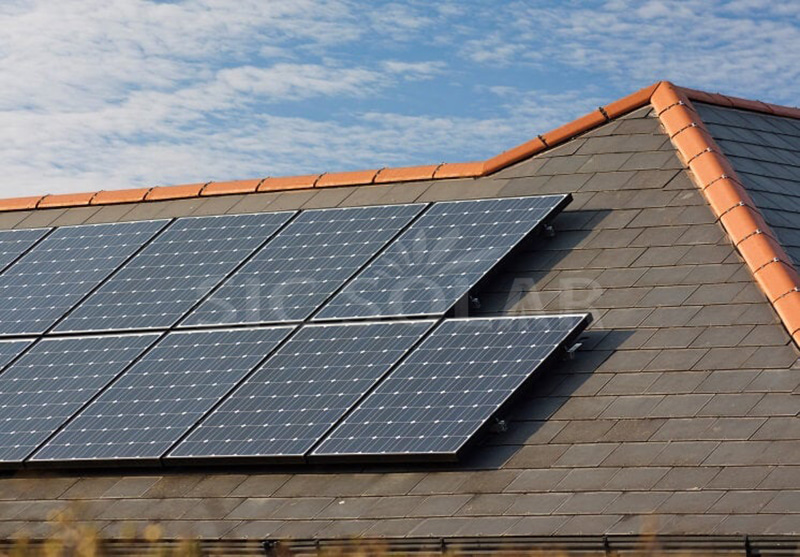
Can Solar Panels Go on Slate Roofs?

Slate roofs are known for their beauty, durability, and long lifespan, often lasting over a century. However, their delicate nature can make homeowners hesitant when it comes to installing solar panels. The good news is that solar panels can be installed on slate roofs, but the process requires special attention and expertise to ensure the roof remains intact and the panels are securely mounted.

Why Install Solar Panels on a Slate Roof?

As the demand for renewable energy grows, many homeowners with slate roofs are exploring the option of adding solar panels. There are several reasons why installing solar panels on a slate roof can be beneficial:

  1. Long-Term Investment: Slate roofs already offer long-term durability, and pairing them with solar panels can enhance the energy efficiency and overall value of the property.
  2. Energy Savings: Like any solar installation, panels on a slate roof can reduce energy bills and contribute to a sustainable energy future.
  3. Aesthetic Preservation: Slate roofs are prized for their classic appearance, and solar panels can be installed in a way that preserves the roof's beauty while providing modern energy solutions.

Challenges of Installing Solar Panels on Slate Roofs

While installing solar panels on slate roofs is possible, there are specific challenges that need to be addressed:

  1. Fragility of Slate: Slate tiles are fragile and can crack or break if not handled carefully. Unlike other roofing materials, such as asphalt shingles, slate requires extra caution during the installation process.

  2. Specialized Mounting Systems: The standard solar panel mounting systems used on asphalt or metal roofs may not be suitable for slate roofs. A specialized approach is needed to avoid damaging the slate tiles while ensuring the panels are securely mounted.

  3. Limited Access for Drilling: Drilling into a slate roof is a delicate task. Improper drilling or over-tightening can lead to cracked tiles and potential leaks. Therefore, installers need to use non-penetrating mounting methods where possible, or advanced techniques to minimize damage.

  4. Professional Expertise: Not all solar installers are experienced with slate roofs. It’s essential to hire professionals who have the necessary expertise in both slate roofing and solar panel installation to ensure a safe and durable setup.

How to Install Solar Panels on Slate Roofs

If you’re considering installing solar panels on a slate roof, here are the key steps involved in the process:

  1. Roof Inspection Before installation begins, it’s important to have the slate roof inspected by a professional to ensure it’s in good condition. Any damaged or loose tiles should be repaired or replaced before the installation process starts.

  2. Use of Specialized Mounting Systems To avoid damage to the slate tiles, specialized mounting systems designed for fragile roofs are required. SIC Solar offers high-quality mounting systems that are adaptable to various roof types, including slate. These systems are engineered to provide secure support for solar panels without causing harm to delicate roofing materials.

    • Non-Penetrating Mounts: Whenever possible, non-penetrating mounts should be used. These mounts don’t require drilling into the roof and instead use a ballast system to hold the panels in place.
    • Adjustable Brackets: For roofs where drilling is necessary, adjustable brackets that distribute weight evenly across the roof can help prevent damage. SIC Solar adjustable mounting systems are designed with flexibility and protection in mind, reducing the risk of damage to fragile roofing materials like slate.
  3. Proper Drilling and Anchoring If drilling into the roof is unavoidable, it must be done carefully. Specialized roof hooks or brackets are often used to secure the panels without cracking the tiles. Installers should drill through the roof at specific points where the underlying rafters provide solid support, minimizing the risk of damaging the slate.

    • Waterproofing: After drilling, it’s crucial to ensure that the roof remains waterproof. A high-quality sealant should be applied around the drilled areas to prevent any leaks. SIC Solar mounting systems include waterproofing solutions to ensure that the integrity of the roof is maintained.
  4. Installing the Solar Panels Once the mounting system is in place, the solar panels can be installed. The panels should be securely fastened to the mounting brackets, and care must be taken to avoid any movement or vibrations that could damage the slate tiles over time.

  5. Wiring and Connections After the panels are installed, the wiring needs to be carefully routed to avoid any unnecessary stress on the roof. Professional electricians will connect the solar panels to the home’s electrical system, ensuring that everything is safely integrated and ready to produce clean energy.

Benefits of SIC Solar Mounting Systems for Slate Roofs

SIC Solar specializes in manufacturing photovoltaic mounting systems that are designed to be durable, reliable, and adaptable to different types of roofs, including slate. Here’s how SIC Solar products can enhance the installation process on a slate roof:

  • Designed for Fragile Roofs: SIC Solar mounting systems are engineered to minimize stress on delicate materials like slate, reducing the risk of cracks and damage during installation.
  • Flexible and Adjustable: The adjustable nature of SIC Solar brackets allows for precise positioning and weight distribution, ensuring that the solar panels are securely mounted without putting unnecessary strain on the roof.
  • Waterproofing Solutions: SIC Solar mounting products include built-in waterproofing features, helping to prevent leaks and protect the roof from water damage, even after drilling.
  • Durability: With SIC Solar high-quality materials, you can be confident that the mounting system will withstand harsh weather conditions and remain durable for many years, ensuring the longevity of both your roof and your solar panels.

Homes With Slate Roofs

Installing solar panels on a slate roof may present some unique challenges, but with the right tools, techniques, and expertise, it’s entirely possible to achieve a successful installation without compromising the integrity of the roof. By using specialized mounting systems, such as those offered by SIC Solar, homeowners with slate roofs can enjoy the benefits of solar energy while preserving the beauty and functionality of their roof.

When done correctly, installing solar panels on a slate roof can lead to significant energy savings and a reduced environmental footprint, all while maintaining the timeless appeal of one of the most beautiful roofing materials available. If you’re considering adding solar panels to your slate roof, be sure to work with professionals experienced in slate roofing and utilize high-quality mounting systems for the best results.

Can you mount solar panels without rails?

When it comes to solar panel installations, traditional rail-mounted systems have long been the norm, offering a reliable way to secure panels to the roof. But as solar technology advances, new methods are emerging, and rail-less solar mounting is gaining popularity. This approach offers unique benefits and can reduce installation costs and time.

Understanding Rail-less Solar Mounting

In a traditional rail-mounted system, rails are attached to the roof, and the solar panels are mounted onto these rails. Rail-less mounting systems, however, skip this step by directly attaching solar panels to the roof using specialized mounts and brackets, eliminating the need for long metal rails.

Rail-less mounting generally requires fewer materials and can streamline the installation process, making it particularly appealing for residential projects. Companies like SIC Solar are at the forefront of developing secure, adaptable rail-less solutions that meet industry standards, providing an alternative for installers and homeowners seeking efficiency and cost savings.

Advantages of Rail-less Solar Mounting

  1. Lower Material Costs
    Without the need for long rails, rail-less systems use fewer materials, which reduces costs. This can make solar more accessible for homeowners and businesses looking to invest in renewable energy. SIC Solar’s rail-free systems are designed to maintain structural integrity without the extra expense of heavy rail materials.

  2. Reduced Installation Time
    Fewer components mean a simpler and faster installation process. With rail-less mounting, there’s no need to measure, cut, and install rails before attaching panels. Installers can secure the mounting hardware directly onto the roof and then attach the panels, which can save hours of labor, especially on smaller projects.

  3. Aesthetically Pleasing
    Rail-less systems offer a low-profile look, which is often more visually appealing, especially on residential roofs. With rail-free mounts, the solar panels sit closer to the roof, which can provide a cleaner and less obtrusive appearance. SIC Solar’s rail-less mounts are designed with aesthetics in mind, so they blend seamlessly into the roof structure.

  4. Lightweight and Flexible
    Rail-less systems are more lightweight, which can be an advantage on roofs that have limited weight-bearing capacity. They are also highly adaptable to various roof types, including metal, shingle, and tile. SIC Solar offers versatile rail-free mounts that can be adjusted to suit different roof angles and layouts, ensuring panels are optimally positioned.

Disadvantages of Rail-less Solar Mounting

  1. Not Ideal for Larger Installations
    While rail-less systems are efficient for residential or smaller commercial projects, larger installations often still benefit from traditional rail mounting. Rail-based systems can more evenly distribute the weight of numerous panels, whereas rail-less setups may require additional anchoring for stability on large arrays.

  2. Limited Flexibility with Panel Spacing
    Rail-mounted systems allow for flexibility in panel positioning and spacing, which is important for layouts that require specific tilt angles or spacing to maximize sunlight exposure. Rail-less systems, on the other hand, are less adjustable, which can limit options for optimizing panel alignment.

  3. Requires Precise Alignment
    Without rails to guide alignment, rail-less installations require precision when placing each panel. Misalignment can impact the aesthetics and efficiency of the system, so experience and skill are necessary for a successful rail-less installation. SIC Solar provides guidance and support to installers to ensure that panels are properly positioned for maximum efficiency.

How Rail-less Mounting Works

Rail-less mounting systems are generally composed of clamps, brackets, and anchors that are attached directly to the roof, either on rafters or structural elements. The solar panels are then fastened onto these mounts using clamps, keeping them securely in place.

Some common components in rail-less systems include:

  • Direct Roof Attachments: Brackets and anchors that secure the mounting system to the roof without additional rails.
  • End and Mid Clamps: These clamps are used to hold the panels in place. They secure the edges and middle sections of each panel, preventing movement even in high winds.
  • Flashing for Waterproofing: As with any roof installation, rail-less systems require flashing to seal penetrations, protecting the roof from water damage.

SIC Solar’s rail-less mounting solutions use corrosion-resistant materials like anodized aluminum and stainless steel, ensuring durability and long-term performance. The mounting hardware is designed to keep panels secure without compromising the roof's integrity, offering a reliable rail-less setup for solar installers.

When to Choose Rail-less Mounting for Your Solar Installation

Rail-less mounting is an excellent option for certain situations:

  • Residential Rooftops: Rail-less systems are ideal for residential installations due to their clean look and minimal structural requirements.
  • Cost-Effective Installations: If budget constraints are a priority, rail-free systems can offer significant savings on material costs without compromising quality.
  • Aesthetic Appeal: Homeowners who prefer a low-profile, streamlined appearance will appreciate the rail-less design.
  • Quick Installations: For installers looking to complete a project quickly, rail-less mounting simplifies the installation process and reduces time on site.

SIC Solar Rail-less Mounting Solutions

SIC Solar, a company specializing in solar mounting systems, offers rail-free mounting products that are optimized for a range of roof types and applications. SIC Solar’s solutions are designed to meet industry standards for safety and durability, ensuring a secure installation that will last for years. Here’s how SIC Solar’s rail-less mounts stand out:

  • High-Quality Materials: SIC Solar uses corrosion-resistant metals that are suitable for harsh outdoor conditions, ensuring that the mounts and clamps can withstand long-term exposure to the elements.
  • Easy Installation: SIC Solar’s rail-free systems are designed to simplify the installation process, making them accessible to both seasoned and new solar installers.
  • Flexibility Across Roof Types: From metal to shingle and tile roofs, SIC Solar’s rail-free mounts provide a secure fit, making them versatile options for various residential applications.

Tips for a Successful Rail-less Solar Installation

  1. Work with Skilled Installers
    Precision is key in rail-less installations, so hiring skilled installers ensures that the panels are correctly positioned and securely mounted.

  2. Use Compatible Components
    Ensure that all components—clamps, brackets, and fasteners—are compatible and weatherproof. SIC Solar’s mounting kits are specifically designed to support various roof types, offering a reliable solution for rail-less installations.

  3. Consider Roof Condition
    Rail-less installations require the roof to be in good condition, as panels are attached directly to the roof structure. Address any necessary repairs before installation.

  4. Perform Regular Maintenance
    Although rail-less systems are designed to be low-maintenance, periodic inspections are recommended to ensure that panels remain securely attached, especially after severe weather.
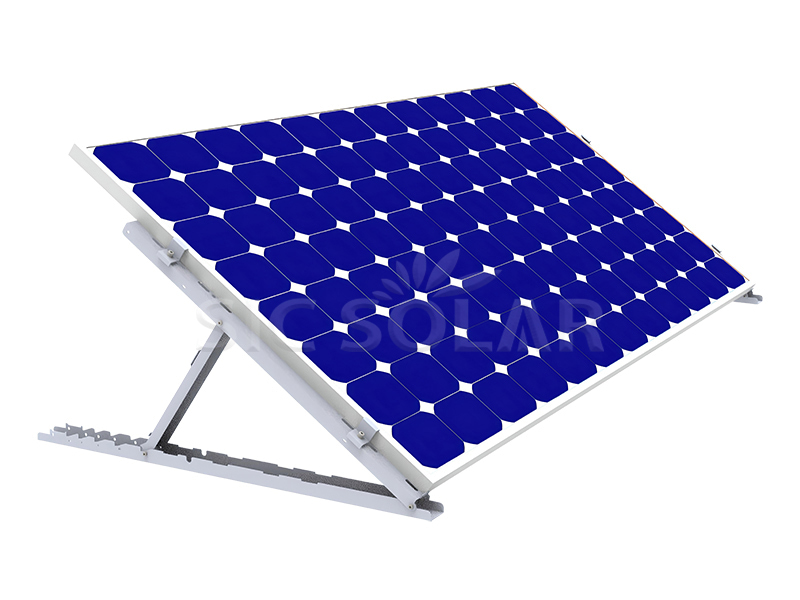
Rail Less Solar Racking

Rail-less solar mounting offers an innovative approach for rooftop solar installations, with advantages in cost, speed, and appearance. By eliminating traditional rails, installers can save on materials and create a low-profile look, making it an appealing option for residential projects. With SIC Solar’s advanced rail-less mounting solutions, homeowners can enjoy a reliable, high-quality installation without the need for traditional rails, combining security, efficiency, and modern design.

As solar technology evolves, rail-free mounting systems may continue to gain popularity for their simplicity and affordability, making solar energy accessible to more homeowners looking to make an eco-friendly transition.

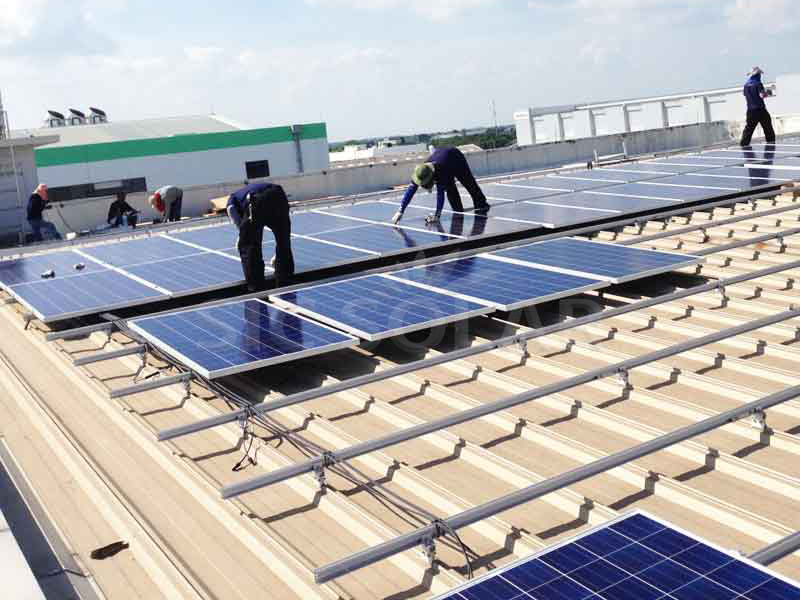
How are solar panels mounted to the roof?

Roof Mounted Solar

Mounting solar panels on a roof is essential for maximizing exposure to sunlight and ensuring system stability and longevity. But the installation process requires a careful selection of materials and methods to ensure panels stay secure and are properly aligned.

Step 1: Choosing the Right Mounting System

Different roof types require different mounting systems, each offering unique benefits for stability and longevity. The three main types of mounting options are:

  1. Roof-Direct Mounts: Direct attachment to the roof material, ideal for lightweight, flat-roof setups.
  2. Rails: A common choice for residential roofs; rails attach to the roof and provide a base for securing the panels.
  3. Ballasted Systems: For flat roofs where drilling into the surface isn’t feasible, weights hold the panels in place without penetrating the roof.

SIC Solar, a producer and supplier of photovoltaic mounting systems, specializes in various roof mounting solutions that fit a range of roof structures. They offer options that enhance stability, resist weather conditions, and ensure long-lasting performance with minimal maintenance.

Step 2: Preparing the Roof

Before any installation begins, the roof must be prepared to ensure safety and stability. This involves:

  • Inspection: Checking the roof's condition to verify it can support the weight of the panels and mounting equipment.
  • Measuring and Layout: Accurate measurements are crucial to ensure that panels will be aligned and positioned optimally to capture sunlight.
  • Safety Precautions: Ensuring a secure work environment by using safety harnesses and equipment is essential to avoid risks on rooftops.

Step 3: Attaching the Mounting Hardware

With the roof prepped, the next step is to attach the mounting hardware. The process varies based on the roof type but generally involves securing brackets or rails. Here’s how it works:

  1. Finding the Roof Joists: In residential settings, rails or brackets are attached to roof joists for stability. Mounting hardware is anchored to these structural elements to ensure a solid base.
  2. Installing Flashing: Waterproof flashing is essential for sealing around any drilled areas to prevent water leaks. This step is especially important for asphalt shingle and tiled roofs.
  3. Securing Mounts or Rails: Brackets or rails are then secured to the roof structure. SIC Solar mounting solutions include durable and corrosion-resistant materials that meet industry standards for safety and durability.

Step 4: Mounting the Solar Panels

Once the hardware is in place, panels are secured using clamps or clips that attach to the rails or mounting brackets. There are typically two types of clamps:

  • Mid Clamps: Positioned between two solar panels, mid clamps secure the sides of each panel.
  • End Clamps: Placed at the edges of the panel array to hold the outermost panels in place.

These clamps are designed to withstand high wind speeds and other environmental stresses, ensuring that panels remain securely fastened. SIC Solar mounting systems come equipped with robust clamps and fasteners that provide a strong grip while allowing for easy adjustments if necessary.

Step 5: Connecting the Electrical Components

After panels are securely mounted, electrical connections are made. This involves connecting the panels to each other and to the inverter, which converts the DC power from the panels into usable AC power for the home or building.

Proper cable management is key for maintaining a neat and secure setup. Cables are typically run along the rails and secured with clips or ties to keep them from moving or getting damaged. SIC Solar offers mounting options that accommodate cable management systems, keeping cables neatly organized and reducing maintenance needs.

Considerations for Different Roof Types

Each type of roof requires specific considerations to ensure a successful installation. Here’s a brief look at the mounting techniques for various roof materials:

  1. Asphalt Shingle Roofs: The most common residential roof type, asphalt shingles, can easily accommodate rails or direct mounts. Flashing is applied to prevent leaks, and the mounting hardware is anchored into the roof’s structural elements.
  2. Metal Roofs: Mounting on metal roofs can vary based on whether it’s a standing seam or corrugated metal. For standing seam roofs, clamps can secure directly to the seams without drilling. For corrugated metal, specialized brackets or rail systems provide stability.
  3. Tile Roofs: Tile roofs can be more complex due to the need to remove and replace tiles around the mounting area. Specialized mounts are often required to prevent tile damage. SIC Solar offers adaptable mounting solutions that can be customized to fit tiled roofs securely.
  4. Flat Roofs: Flat roofs commonly use ballasted mounts to avoid drilling. In some cases, low-profile rails are also an option, especially if a slight tilt is needed to optimize sunlight exposure.

Benefits of SIC Solar Mounting Systems

SIC Solar, a leader in solar mounting systems, provides a range of products designed to adapt to different roof types and environmental conditions. Here are some reasons why SIC Solar systems stand out:

  • Corrosion Resistance: Made with high-quality materials like anodized aluminum and stainless steel, SIC Solar mounting systems resist corrosion, ensuring durability in various climates.
  • Quick Installation: SIC Solar designs products with efficiency in mind, simplifying the installation process for both residential and commercial projects.
  • Versatile Applications: Whether for shingle, tile, or metal roofs, SIC Solar systems offer flexibility, making it easier for installers to find a secure mounting solution that matches the roof’s requirements.

Why Mounting Matters

Proper mounting ensures that the solar panels function optimally and remain stable throughout their lifespan. A reliable mounting system also protects the roof by minimizing penetration points and reducing the risk of leaks. With innovations from companies like SIC Solar, homeowners and businesses alike benefit from mounting systems that deliver both security and ease of installation.

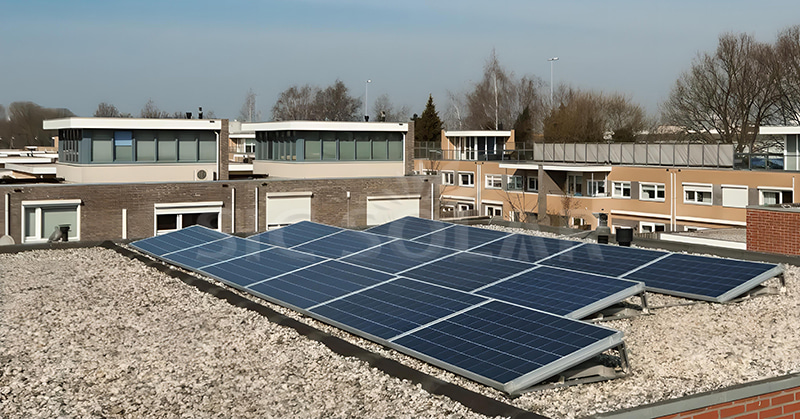
How do you anchor solar panels on a flat roof?

Installing solar panels on a flat roof can be an effective way to harness solar energy, especially in urban areas where space is limited. However, ensuring that the panels are securely anchored is crucial to withstand various weather conditions, such as high winds and heavy rain.

Why Proper Anchoring Is Important

Properly anchoring solar panels on a flat roof is essential for several reasons:

  1. Wind Resistance: Flat roofs are more susceptible to wind uplift. Without proper anchoring, panels can become dislodged, which can lead to damage or complete system failure.
  2. Stability: Secure anchoring ensures that the panels remain in place and perform optimally over their lifespan.
  3. Safety: A well-anchored system reduces the risk of panels being blown off, which could pose hazards to people and property below.

Best Practices for Anchoring Solar Panels on Flat Roofs

  1. Use the Right Mounting System
    The first step in anchoring solar panels on a flat roof is choosing an appropriate mounting system. Mounts designed specifically for flat roofs are available, often featuring adjustable angles to optimize solar exposure. SIC Solar offers a variety of mounting solutions tailored for flat roof installations, ensuring stability and efficiency.

  2. Ballasted Systems
    Ballasted mounting systems utilize weight to hold the solar panels in place. This method is particularly effective for flat roofs, as it does not require penetrating the roof surface, which minimizes the risk of leaks. These systems typically involve placing concrete blocks or other weights on the mounting frame to secure the panels. It’s important to calculate the appropriate ballast weight based on local wind loads and building codes.

  3. Penetrating Mounts
    In some cases, using penetrating mounts may be necessary, especially in areas with high wind speeds. This method involves securing the mounting brackets directly to the roof structure. When using penetrating mounts, ensure that proper sealing techniques are applied to prevent water intrusion. SIC Solar mounting systems are designed to allow for secure penetration while maintaining roof integrity.

  4. Adjustable Tilt Angles
    To maximize energy production, consider using adjustable tilt mounts that allow you to set the panels at the optimal angle for your geographical location. This ensures that the panels capture the most sunlight throughout the year, enhancing overall system efficiency.

  5. Positioning and Layout
    Plan the layout of your solar panels carefully. Ensure adequate spacing between panels to prevent shading and allow for maintenance access. Additionally, consider the direction and angle of installation to optimize solar exposure.

  6. Regular Inspections and Maintenance
    After installation, regularly inspect the anchoring system and mounting structure for any signs of wear, damage, or loosening. Address any issues promptly to maintain the system's integrity and performance.

How SIC Solar Can Enhance Your Installation

SIC Solar specializes in producing high-quality mounting systems that simplify the installation process for flat roof solar panels. Here’s how SIC Solar can make a difference:

  • Durable Materials: SIC Solar mounting systems are constructed from robust materials designed to withstand various weather conditions, ensuring long-term reliability.
  • Customizable Solutions: With adjustable tilt options, SIC Solar's systems can be tailored to match your specific roof and energy needs, maximizing solar exposure.
  • Easy Installation: Designed for user-friendly installation, SIC Solar's products help both professionals and DIY enthusiasts achieve secure and efficient mounting with ease.
  • Integrated Ballasting Options: SIC Solar provides innovative ballasting solutions that allow for secure installations without penetrating the roof, reducing the risk of leaks and maintaining the roof's integrity.

Solar Panels For Flat Roofs

Anchoring solar panels on a flat roof requires careful consideration of the mounting system, weight distribution, and installation techniques. By following best practices and utilizing high-quality mounting solutions from SIC Solar, you can ensure that your solar installation is secure, efficient, and built to withstand the elements. With the right approach, you can maximize your solar energy production while protecting your roof and investment for years to come.